How to make a Rope Bowl using a Mountain Thread Co. Kit!

It seems like we were at QuiltCon ages ago....literally ages. But it was only 5 months ago....haha what?? So much has happend since then, it's crazy to think how much (or how little) time has actually passed. Regardless....back to QuiltCon. I'm was very saddened to learn that QuiltCon 2021 is going to be completely virtual. Don't get me wrong, I think they will do a marvelous job, everything the Modern Quilt Guild creates is golden! But I'll really miss having that human interaction where we get to browse around, meet new faces, learn new skills and glean all sorts of new quilt-y inspiration. It's for the best, I keep telling myself that....but I am for sure crossing all of my fingers and toes and hoping that QuiltCon 2022 happens in-person!
Reeling it back in.....the whole purpose of me bringing up QuiltCon is the fact that I stumbled across a really neat company while I was roaming the QuiltCon aisles back in February. What initially caught my eye was that this company was from my home state! If you remember, QuiltCon was in Austin, Texas...so when I saw "Blowing Rock, North Carolina" printed on this company's name card my eyes lit up and I immediately went in to introduce myself!
.
Mountain Thread Company
When I walked into Mountain Thread Company's booth, I was greeted by Katherine as she was seated at her sewing machine, sewing together a long, coiled piece of rope. She had a crowd of people around her and she was warmly explaining what she was doing while answering any questions that the crowd of people had. We were all mesmerized! To see her create this growing bowl out of a piece of rope, right before our eyes was pretty fun to watch! We later connected about how we were both NC girls. She invited me to her shop...sadly I never got the chance thanks to COVID, but I hope to one day!
Flash forward to present day....I figured it was time to give this rope bowl a try! I searched her website, and started looking around. Ultimately I decided to go with a kit, which includes everything....but here are the supplies that you need to make a rope bowl:
Supplies:
- 100% cotton rope: Mountain Thread Company has a really great high quality, signature rope. It's available by the yard or in as a spool.
- Thread: I just used 50 weight Aurifil thread, which is what they recommend
- Heavy Duty Needle: They recommend using a 100/16 needle, which is included in the Rope Bowl Kit.
- Kits: A kit is an excellent project starter for the sewist who’s ready to go. Each of the Mountain Thread Company kits contains the following: the 100% cotton signature rope, a heavy duty needle, step by step instructions, and illustrations for completing the project. Choose among the Rope & Fabric Coaster Kit (makes 4 coasters), the Oval Basket Kit (makes one oval organizer - a popular size!), and the Coiled Rope Basket Kit (the most open ended kit with a selection of ideas to build on). Then there's the Set of Three Rope Bowls kit and the Organizer Basket kit. Personally, I want to try them all!
.
Like I said, I ultimately picked out a kit...I went with the Coiled Rope Basket kit, since I wasn't exactly sure what direction I wanted to go.
.
.
When it came to my front door, it was like Christmas morning! As ya'll know, I mostly sew quilts. Like 99.99% of my projects are quilts, so I don't have a lot of experience sewing other things. That being said, I was really excited to try something new and create something different. It was a stretch to my creativity that was much needed!
.
.
When I opened the box, I noticed that the instructions were printed on the inside of the box....love it! Everything was very clear and well written. There were diagrams and different finishing ideas. She even explained how to add in fabric scraps...which I opted to do. :)
I loved that she also sent a heavy-duty needle. Literally, all I had to do was swap out my needle, change my Janome to a zig zag stitch, adjust my stitch length and I was ready to roll!
.
.
.
It was such an easy process! I thought that my bowl would surely turn out lop-sided, but I did exactly as Katherine instructed and I was so pleasantly surprised by how it turned out!
Essentially, you're just creating an initial coil, then zig-zag stitch around the coil as you continue to to turn it. Mountain Thread Company has some really great videos showing and explaining this process.
.

.
.
After you get to a certain point (which Katherine elaborates on) you'll lift up on the edge of the base to create the edges of your bowl. I was shocked to see this thing come to life before my eyes!
.

.
.
.
.
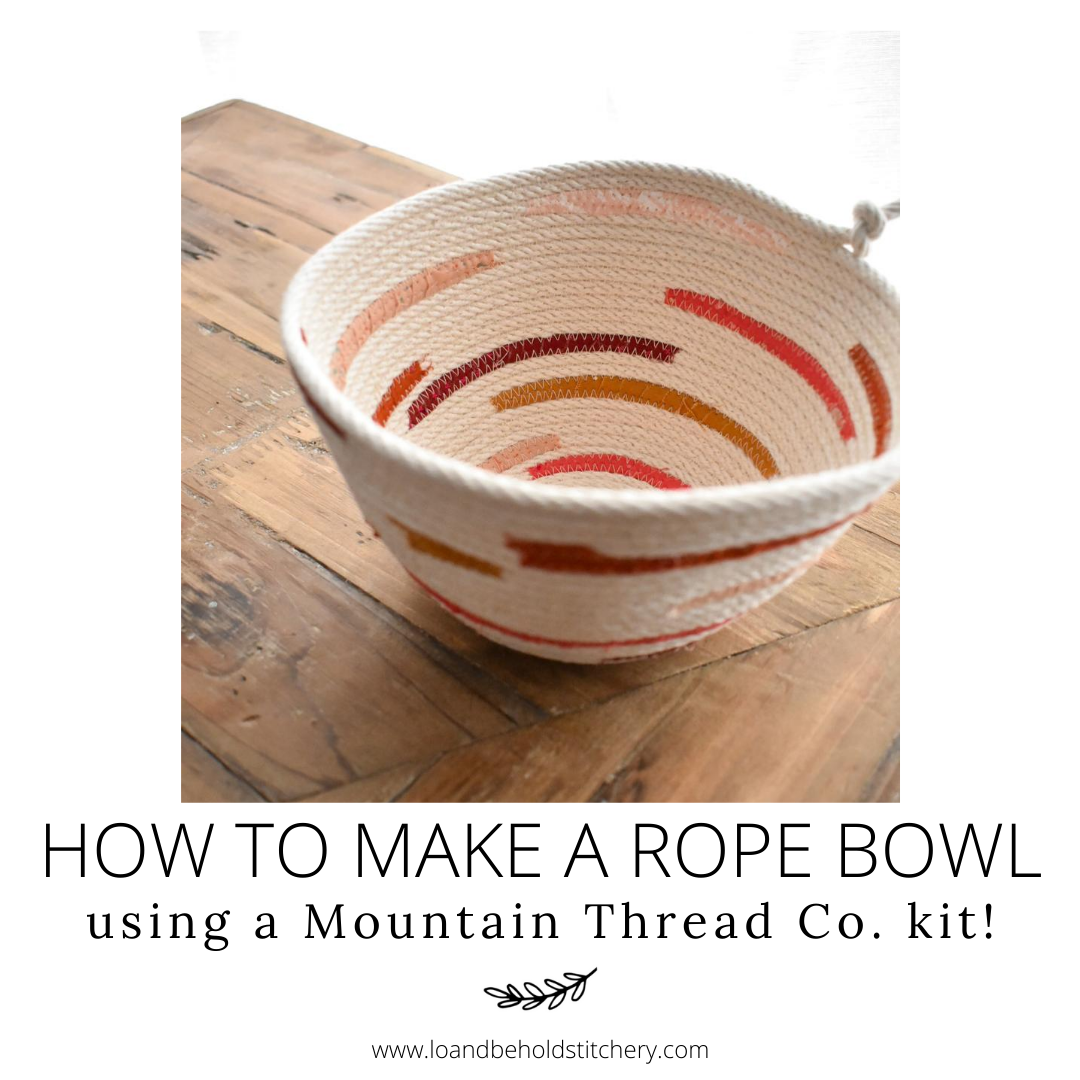
Katherine offers a few different ideas for how to finish your rope bowl. I opted for the knot because isn't it adorable??
.
.
.
.
Adding in fabric scraps was a super fun way to add extra color and texture. It also opens up so many possibilities with personalizing these baskets for gifts! I definitely plan to make a few for Christmas this year. I also wanted to point out that I had some rope left-over....I could probably make another smaller bowl if I wanted to, or I could've kept making my bowl a bit larger. Again, the possibilities are endless, which is what makes this project so fun!
.
If you haven't already, go ahead and check out the Mountain Thread Company! Follow her on Instagram and Facebook !


