Knitted Star Quilt for Quilter's Candy Members

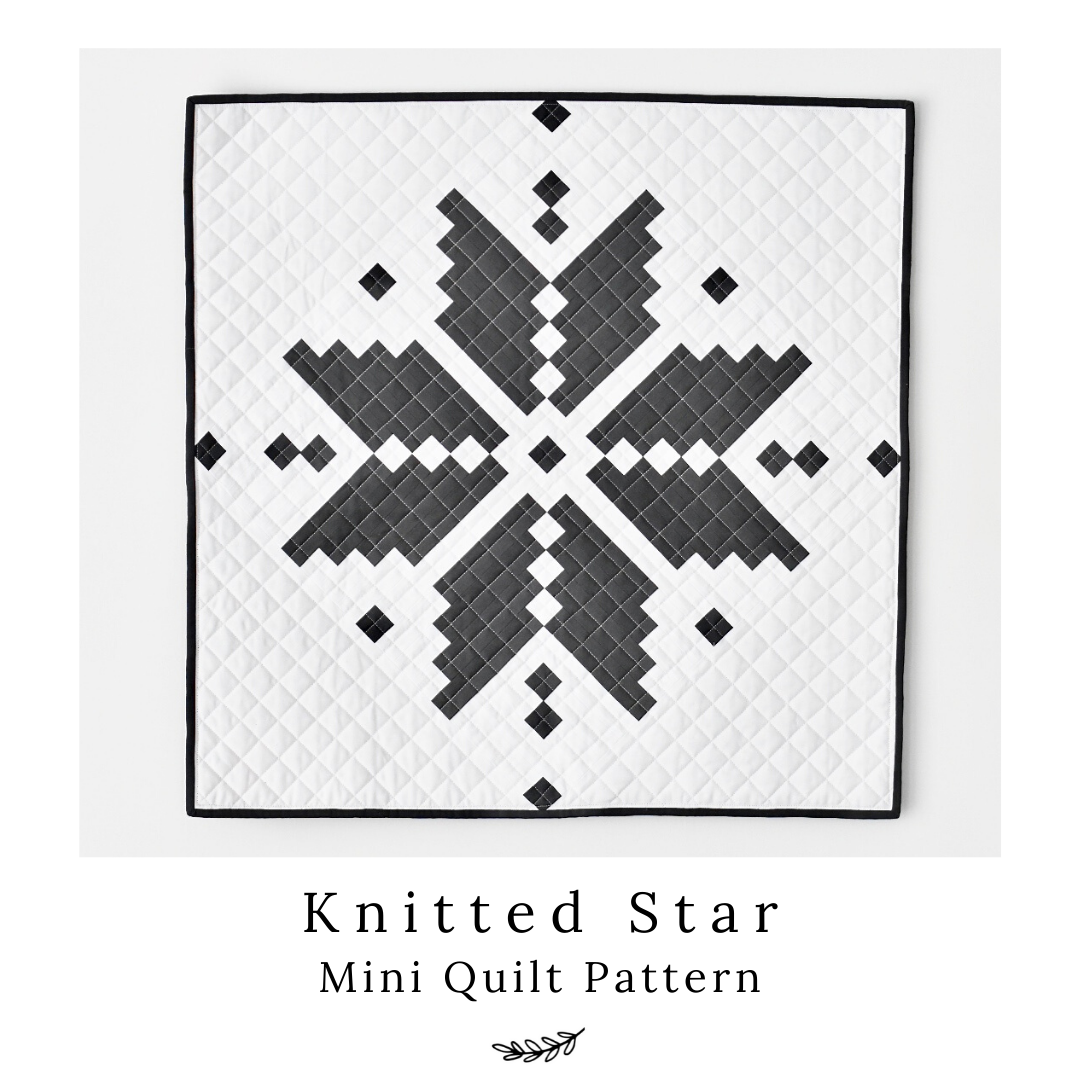
I'm so excited to introduce my mini quilt pattern for the Quilters Candy members....Knitted Star!
.

.
.
This pattern was inspired by favorite pair of Christmas socks! Does anyone else LOVE the look of knitted "fair isle" type designs? I know I do! So I decided to make a quilt pattern that looked like it has been knitted.
.
.
This pattern is surprisingly fun to put together. The pieces are a little small, but overall, I think that really contributes to "knitted" vibe of the quilt.
I used Robert Kaufman Kona Gotham Gray and White. If you've been here for any amount of time, you might know that I love the simplicity of two color quilts. It just makes for a more bold and striking finish.
I don't typically use starch, but...if you are a little nervous about working with such small pieces, starching may help! Remember to starch your fabric BEFORE you cut your pieces. If you starch after you cut your pieces....well, A) that can get a little messy and B) your pieces might shrink up...which is no bueno!
Another tip that I have for this pattern is to use a scant 1/4" seam. I know, I know, scant 1/4" seams are no fun. TRUST me....I've been there. I normally don't take too much stock on whether or not my 1/4" seam is scant. I typically just put my 1/4" presser foot on and go to town. I've noticed that a scant 1/4" seam is necessary when there are a lot of seams in a block of project. You might've experienced this if you've made my Interwoven quilt pattern.
So what is "scant"? When you press your seams, you loose a little bit of your fabric to the thread width. Even though, you don't really think about it, your thread really does take up a small little smidge of your fabric. Your fabric has to go around your seam/thread width once you fold it to press the seam. So say the thread width and the fold width account for 1/32'nd of an inch. Pretty small right? Well, multiply that times 9 seams, and it adds up to over 1/4"! Take a look at the photos below.
.

.
So how do you adjust your seam allowance? Adjust your needle position until it's just right. Consider using a 1/4" seam presser foot, or marking your machine with a piece of tape to help line up your fabric. Test your seam allowance by sewing ten 1.5" x WOF strips together lengthwise. (I strip pieced two 1.5" strips together, then cut those up into 4" units, then pieced 5 units together...see photos below).
.

..
.
.

.
As you are sewing your ten 1.5"x 4" strips together, measure your strips. If a strip is in the middle of two strips, it should measure 1". Outside strips (only one sewn edge) should measure 1.25". If your middle strips are larger than 1", your seam allowance is too scant. If they're smaller than 1", your seam allowance needs to be more scant. This may take some trial and error. Once you find the perfect needle/fabric position, consider using tape to mark your machine.
.
Below is how your strips should look when they're accurately sewn together. Remember, ten 1.5" strips sewn together using a scant 1/4" should measure 10.5".
.
 .
.
If you use a 1/4" seam presser foot, pay attention to your needle position. You may need to adjust it a little to achieve a scant 1/4". The fabric might need to be right up against the guide bar, or only lightly touching it. I LOVE using my 1/4" seam presser foot and I always use it for piecing.... but I try not to get too comfortable with it. I still need to make small adjustments sometimes.
.

.
You can find a 1/4" presser foot on Amazon. They typically fit most machines, but for your best bet, find one for your specific machine brand.
.

.
Back to Knitted Star. :)
.

.
I finished off my quilt but doing simple 1" crosshatch quilting. Since the block is "on point", I used my seams as guides. I choose white thread so that it would blend in with the background of my quilt. I was a little nervous that this would look too "thready" on the star portion of my quilt, but it turned out more subtle than I thought it would....which makes me happy!
I will be using this block to make a larger quilt pattern, which will release Summer, 2020. Since there are more blocks in the larger quilt, I'll definitely write for strip piecing to help save time. I'm so excited to see this one come to life! Here's how it'll look.
.

.
Here are a few Knitted Star mini quilts from my pattern testers!
Rachel from @quiltsforallsparrows used these adorable prints for her mini quilt. How cute are those little candies!?

.
Steph of @beansyquilts created this classic red and white wall hanging. Beautiful!

.
Kara of @hollandhomesteaddesigns also did a darker background color, but I love that she used navy! I feel like this could stay up year round. Bravo!

.
.
I hope you all love this pattern! Be sure to tag me on social media with your Knitted Star progress! Also, use the hashtags #knittedstarquilt and #loandbeholdpatterns.
.
.
Happy quilting!
Brittany


