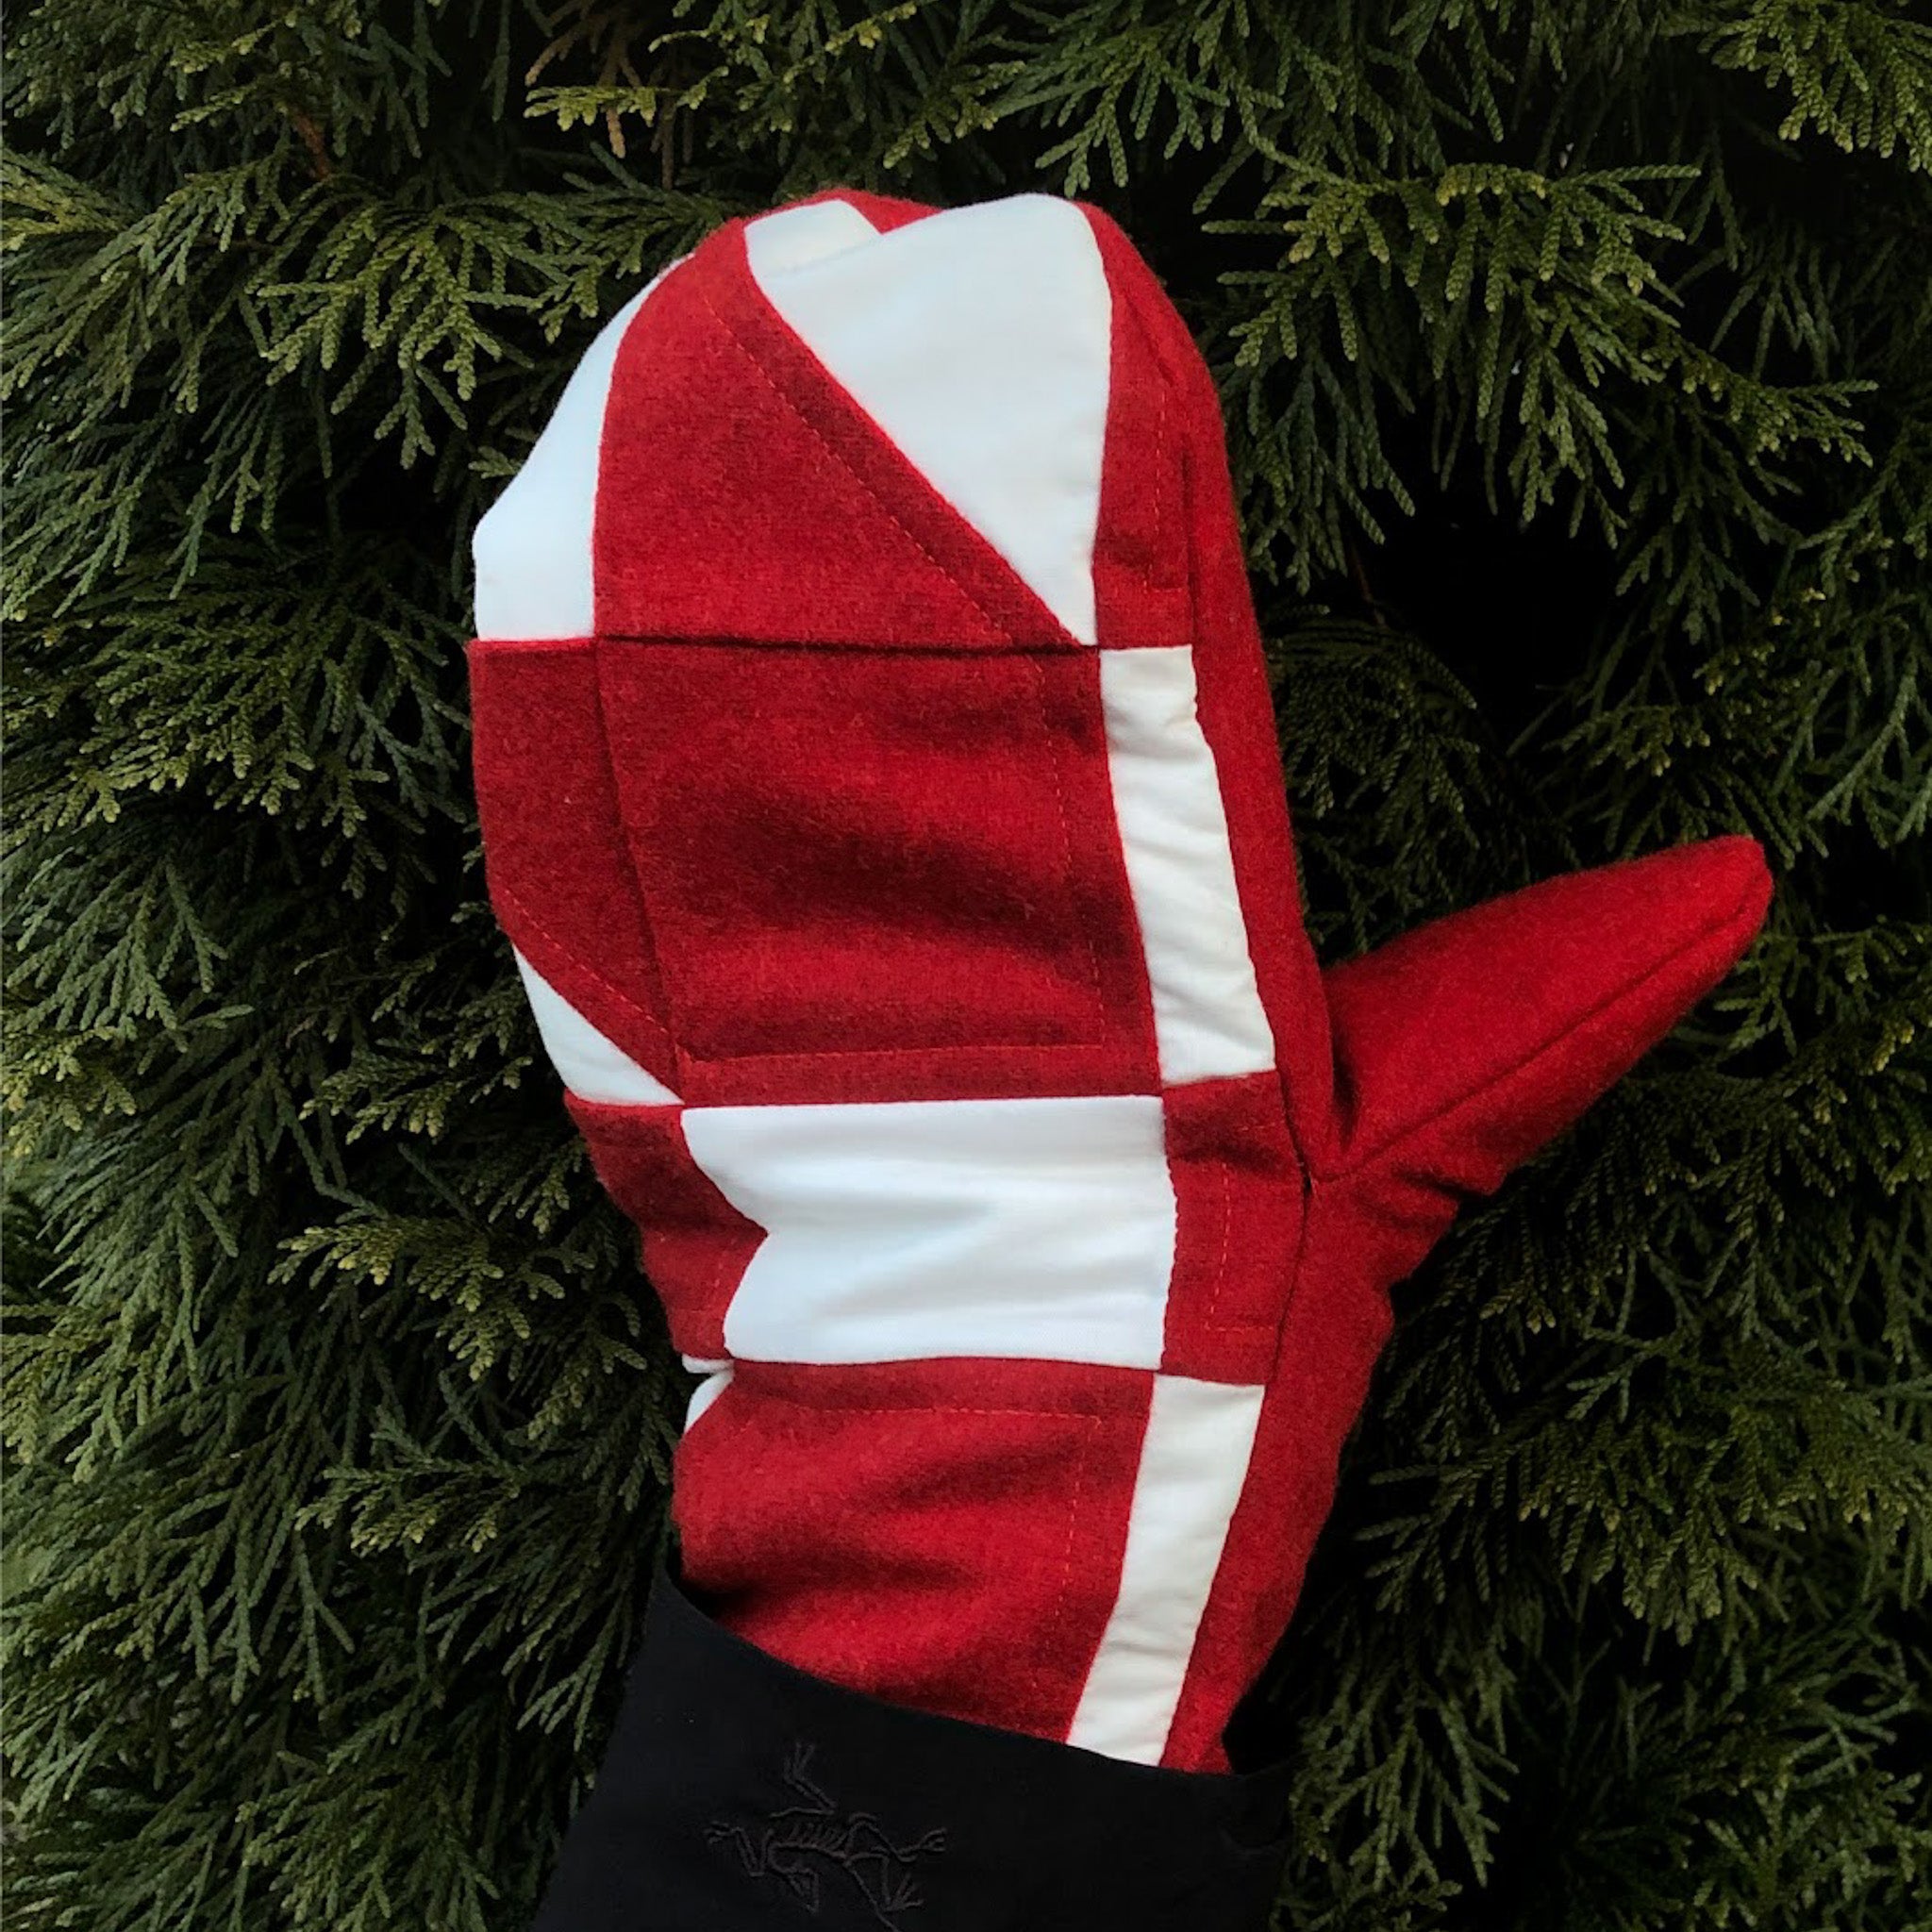
Quilt Mitten Tutorial - Christmas Joy Quilt Edition
Not Ready for a Quilt Coat?
Perfect Handmade gift to Keep Them Warm

.
Materials Needed to Make your Quilt Mittens
(For a pair of mittens any size)
- Mitten Pattern by Kelsey Williams of Lovely and Enough
- one 9" to 12" square quilt block
- mitten fabric, 1/4 yard (this will be used for the palm and fingers of your mittens)
- batting, 1/3 yard (cotton or wool)
- lining, 1/3 yard (any soft woven or knit)
- elastic, 8" (1/4" - 3/4" wide)
- embroidery floss and needle, if you choose to attach elastic and finish wrist by hand
.
Make your Quilt Block
.
 .
.
..
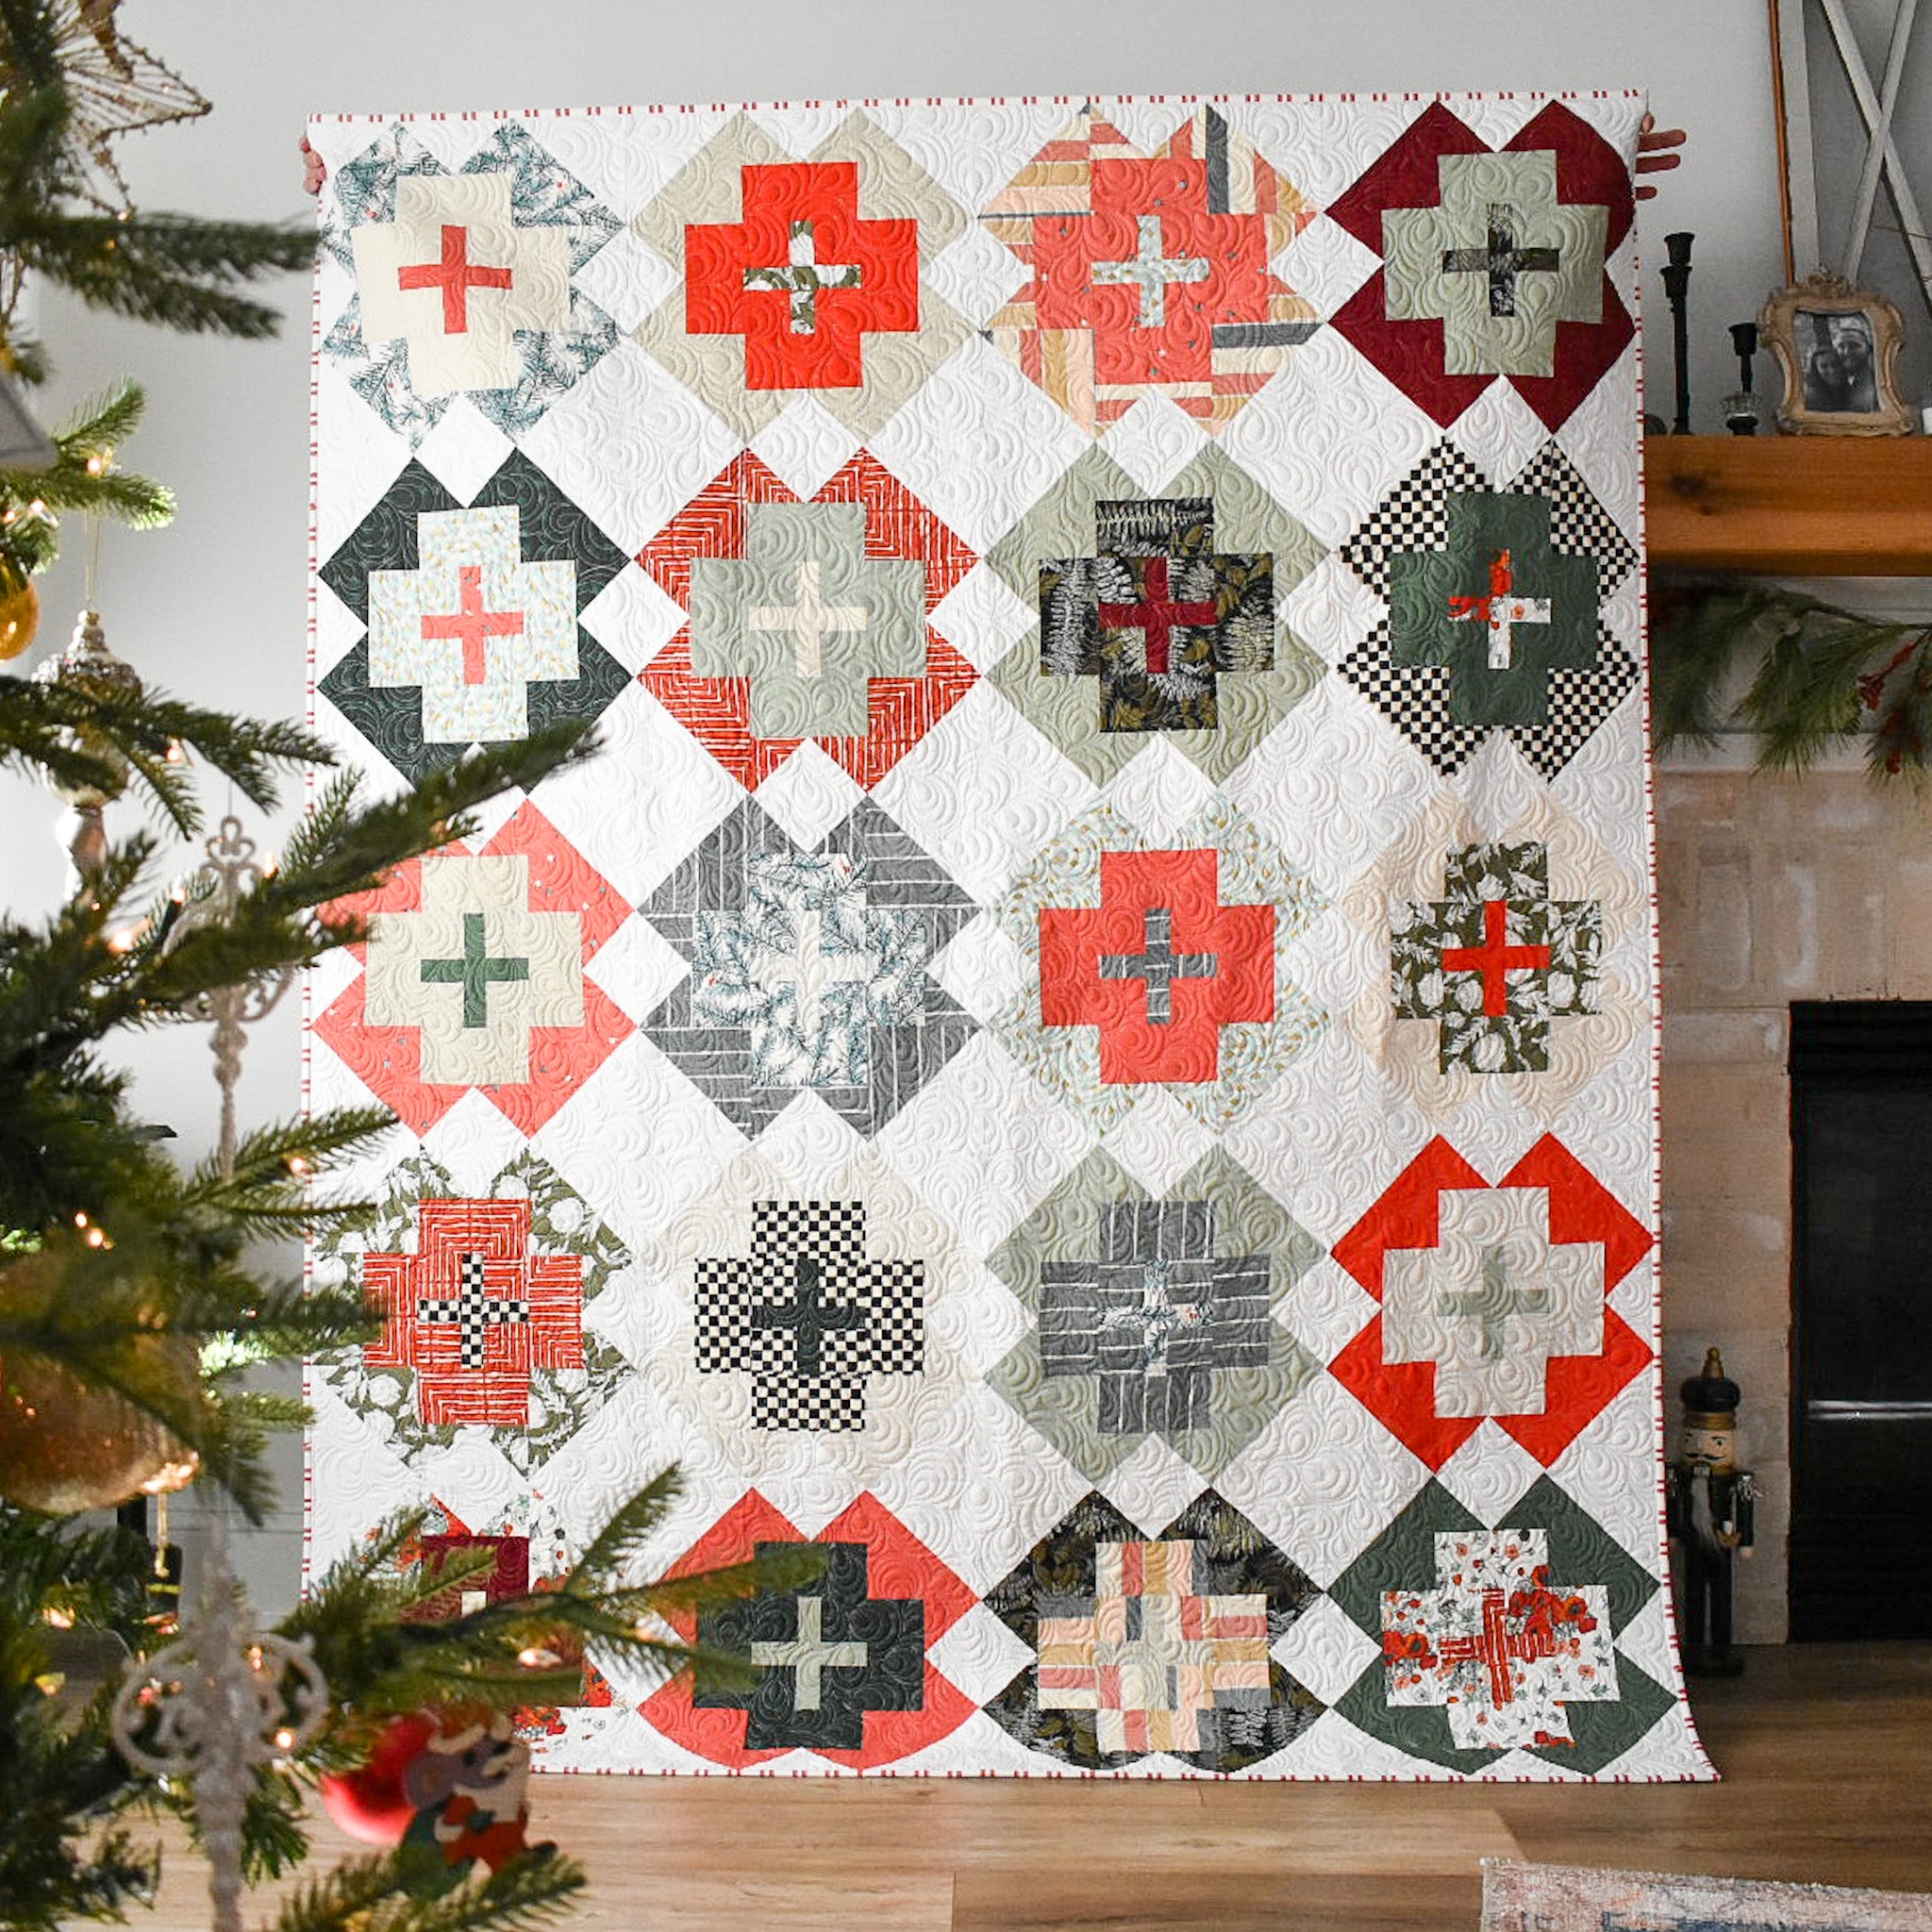
Christmas Joy Quilt Block for Mittens
.

.
.
Construct Your Quilt Mittens
Step 1: Piece the Quilt Block
Piece your chosen quilt block. Use the sizing guide in the Lovely and Enough mitten pattern to decide which size mitten you would like to make and, therefore, how big your quilt block needs to be. For a large mitten, you will need a 12” x 12” quilt block. Medium: 11” x 11”. Small: 10” x 10”.
If you would like the whole quilt block to be visible on your mittens (see image above), consider sewing a quilt block that finishes at 9” x 9” or less. Then add a border to each side of the block to achieve the size block you need for your chosen size of mitten.
.

.
Step 2: Sandwich the Quilt Block
Once you have pieced your quilt block, it’s time to sandwich it. Cut a square of batting 12" x 12". Pin or spray baste the batting to the back of your quilt block. You will not have a backing on your quilt sandwich, just the quilt block and batting.
Note: Ensure that all your seams are lying flat and in the direction that you pressed them. We don’t want any red peeping through the white bits in the Christmas Joy quilt block because they folded toward the white accidentally as the block was basted!
.

.
Step 3: Quilt the Quilt Block
Now, quilt your block as you desire. Avoid dense quilting patterns as each line of stitching creates a row of tiny dots where cold air can enter the mitten. Pull all loose threads to the back and tie them off. Don’t worry about burying the ends, as these threads will be hidden under the mitten lining.
.

.
Step 4: Cut Two Mitten Pieces from the Quilt Block
It’s time to cut out your mitten pieces. Print out the Lovely and Enough mitten pattern and use the sizing guide to decide which size you would like to make.
Cut two back-of-hand pieces from your quilt block. These need to be mirror images. For one place the pattern piece face up on your quilt block and cut around it, and for the other place the pattern piece face down on your quilt block and cut around it. To ensure your quilt mittens are symmetrical and align when placed next to each other, consider cutting your quilt block perfectly in half then abutting the long edge of the pattern piece to newly cut edge of the block.
.

.

.

.

.

.
Step 5: Baste the Wrist Edge
Baste the wrist edge of your mitten pattern pieces. Sew a line of stitching in the seam allowance, 1/8” from the edge. This stops your quilting seams from pulling out as you construct the mittens.
Step 6: Finish your Quilt Mittens
Follow the Lovely and Enough mitten pattern instructions to finish your mittens. From your quilt block, you have created the back of the mittens, so skip cutting out any back-of-hand pieces (fabric or batting) until you get to the lining.
.

.
Share your Quilt Mittens
We would love to see what you make, so tag your pictures on Instagram with #QuiltMittens, #LovelyEnoughMittens, and #ChristmasJoyQuilt. You can also peruse these hashtags for inspiration before making your next pair. Can’t wait to see the quilt mittens you create! Stay warm and cozy.
- Kelsey of Lovely and Enough
.
.
.

.
LINKS: