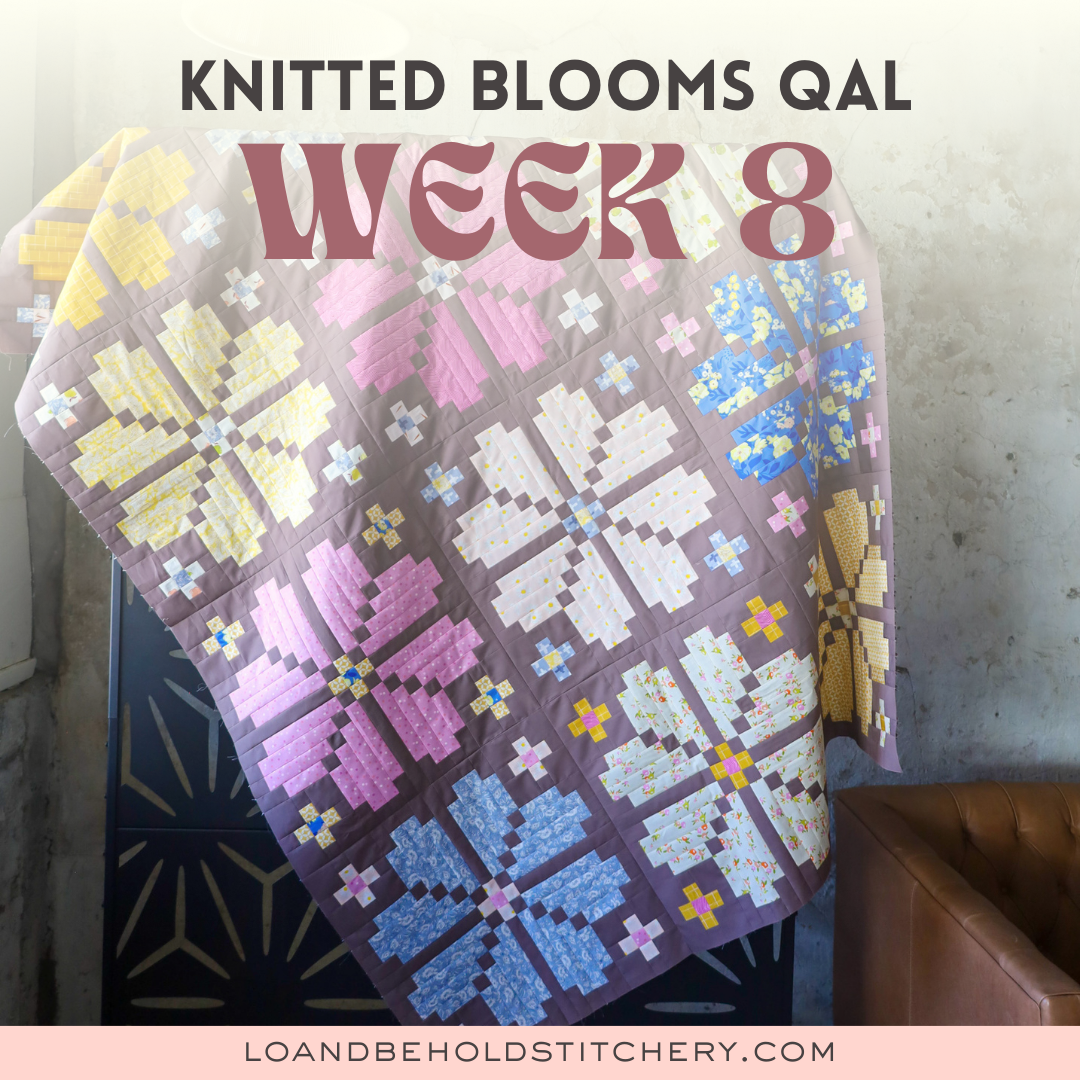
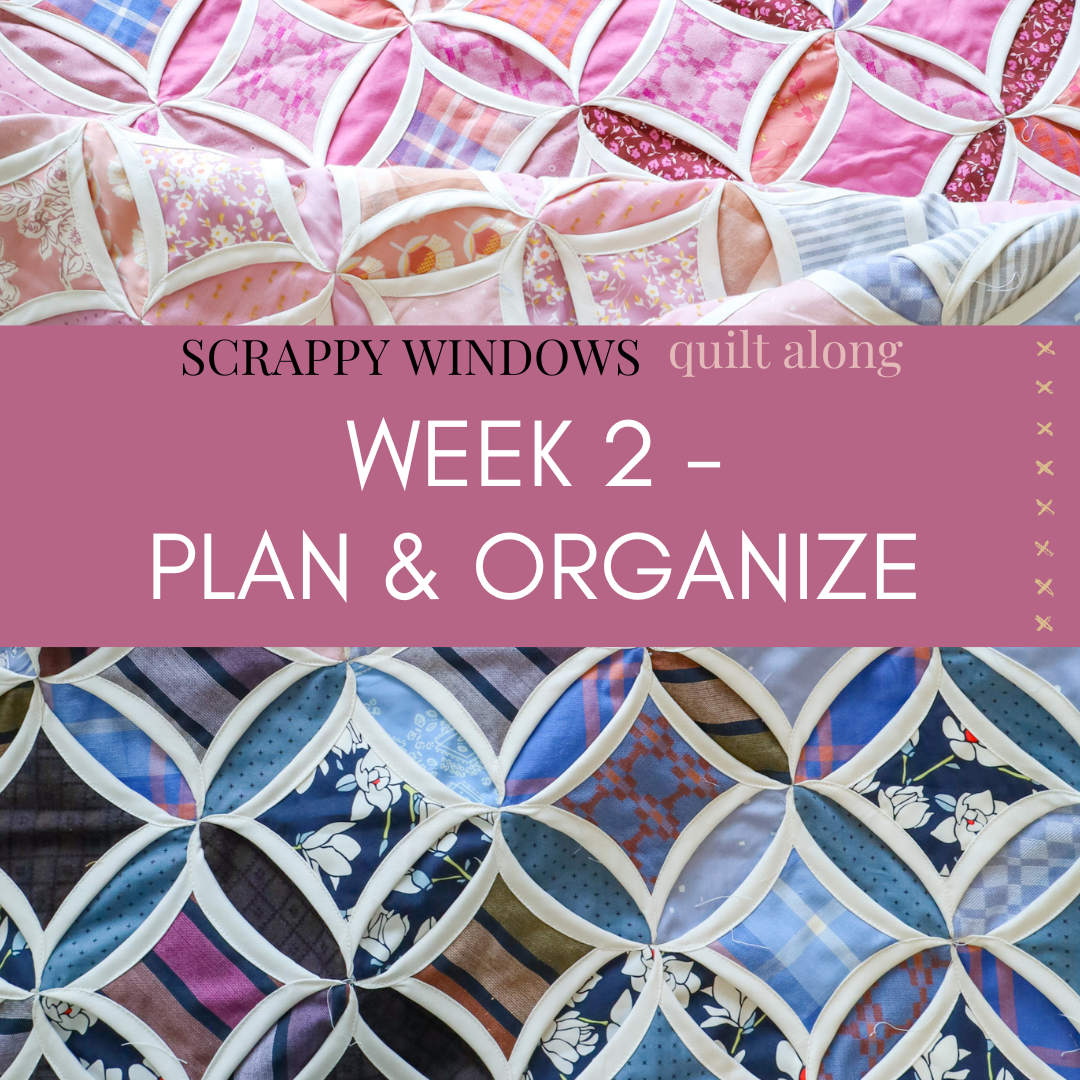
Scrappy Windows QAL - Week 2 - Plan & Organize
- Week 1 Blog Post (Cutting)
- Scrappy Windows Quilt Kits
- Scrappy Windows Blog Post
- FREE Scrappy Windows pattern
- Shop Scrappy Windows kits
.
Schedule

.
Week 2
This week, we are planning, organizing and pressing frames. If you are creating a quilt that has a very specific layout (especially if it's larger), this week is very important!
PLANNING
By this point, you've probably given your layout some thought. Or maybe you haven't...that's okay too! Regardless, let's talk about that for a moment.
Similar to the Ombre Puff Quilt, I designed this quilt with ombre in mind. It feels modern, organized, aesthetically pleasing and I just love how they it can add interest and variety to any design. That said, I do also love a random, more "patchwork" feel that is unplanned and maybe a bit more traditional.
Randomized Approach
If you are going this route and creating a more random feel, then you're in luck. The planning phase will be super easy for you! This is actually true for me with the new Scrappy Windows quilt that I'm making for this quilt along. I have low-volume fabrics for the Window and Background fabrics and a solid contrasting fabric for the frames. I actually don't plan to lay out any squares or organize any rows before I start sewing my pockets. I will simply move forward next week with sewing my Pocket units without a care in the world about which fabric goes where. It'll be nice. :)
Ombre Layout
If you are creating a layout that has an ombre fade or a specific design, then you'll want to lay out all of your squares at this point. This is when things start to get real!
You'll first want to lay out your Background Squares. If you're making the larger sizes, you'll probably need to do this on a bed or the floor. These squares might all be solid, or they might be multi-color. Decide where you want each one to go, keeping in mind that they're the "orange peel" shape within the quilt. They aren't quite as prominent as the Window piece.


Then, as messy or disorganized as it may feel, it's time to take it a step further and plan your Window squares. This means putting those squares diagonally throughout the quilt. It seems a little awkward and chaotic at first but trust the process. You want to figure this out before next week!

When it comes to ombre quilts, I've been asked why I tend to create a gradient along the diagonal of the quilt. I never really noticed that I did this until someone pointed it out! I have several designs that use color gradients but I will say that the diagonal gradient is my favorite. I think it's because I feel like I have more room to randomize things and potentially introduce new colors. This isn't always necessarily the case, but it's generally how my brain works.

I borrowed this graphic from a blog post that I wrote a 2 years ago during our Ombre Puff Quilt Along. All of the same principles apply to this quilt if you want to take a look!
Tips for Creating an Ombre Quilt Blog Post
If ombre isn't your thing, that's okay too! There are a few designs in the pattern that are unique and make a statement without being necessarily ombre.


Organizing
Once you have all of your fabrics planned and you know exactly where you want each piece to appear within your quilt, then you'll want to label all of your Window rows and all of your Background rows. Again, if you're doing a randomized layout, you're off the hook for this step!


It's really important to stack these pieces the same exact way from row to row. So the pieces that are on top are from the far right edge of my quilt. The pieces that are on the bottom of the stack are on the far left edge of my quilt.
Pressing Frames
Now let's press all of our Frames in half diagonally. You'll want to fold the Frame squares so that they're wrong sides together. If you're using a print or a fabric that has a right side, it'll be on the outside of the Frame pieces.
Supplies
- Iron - If you're in the market for a new iron, I have been too. I recently purchased this iron for less than $30 on Amazon and I love how light weight it is.
- Clips - I use these clips for all sorts of things. If you need something like in the photo above, these would be a great option.
Video
We're completing minutes 4:32-7:06 in the Scrappy Windows video tutorial.
Week 2
By the end of this week (Friday, Sept. 1) you should have your pieces all organized by rows (if applicable) and all of your Frame squares press in half diagonally.

.
Next week, we'll start sewing! I'll see you then!
LINKS
- Scrappy Windows - Quilt Kits
- Scrappy Windows - FREE Pattern!
- Scrappy Windows - Video Tutorial
- Scrappy Windows - Original Blog Post