FREE Mini Christmas Joy Block Tutorial
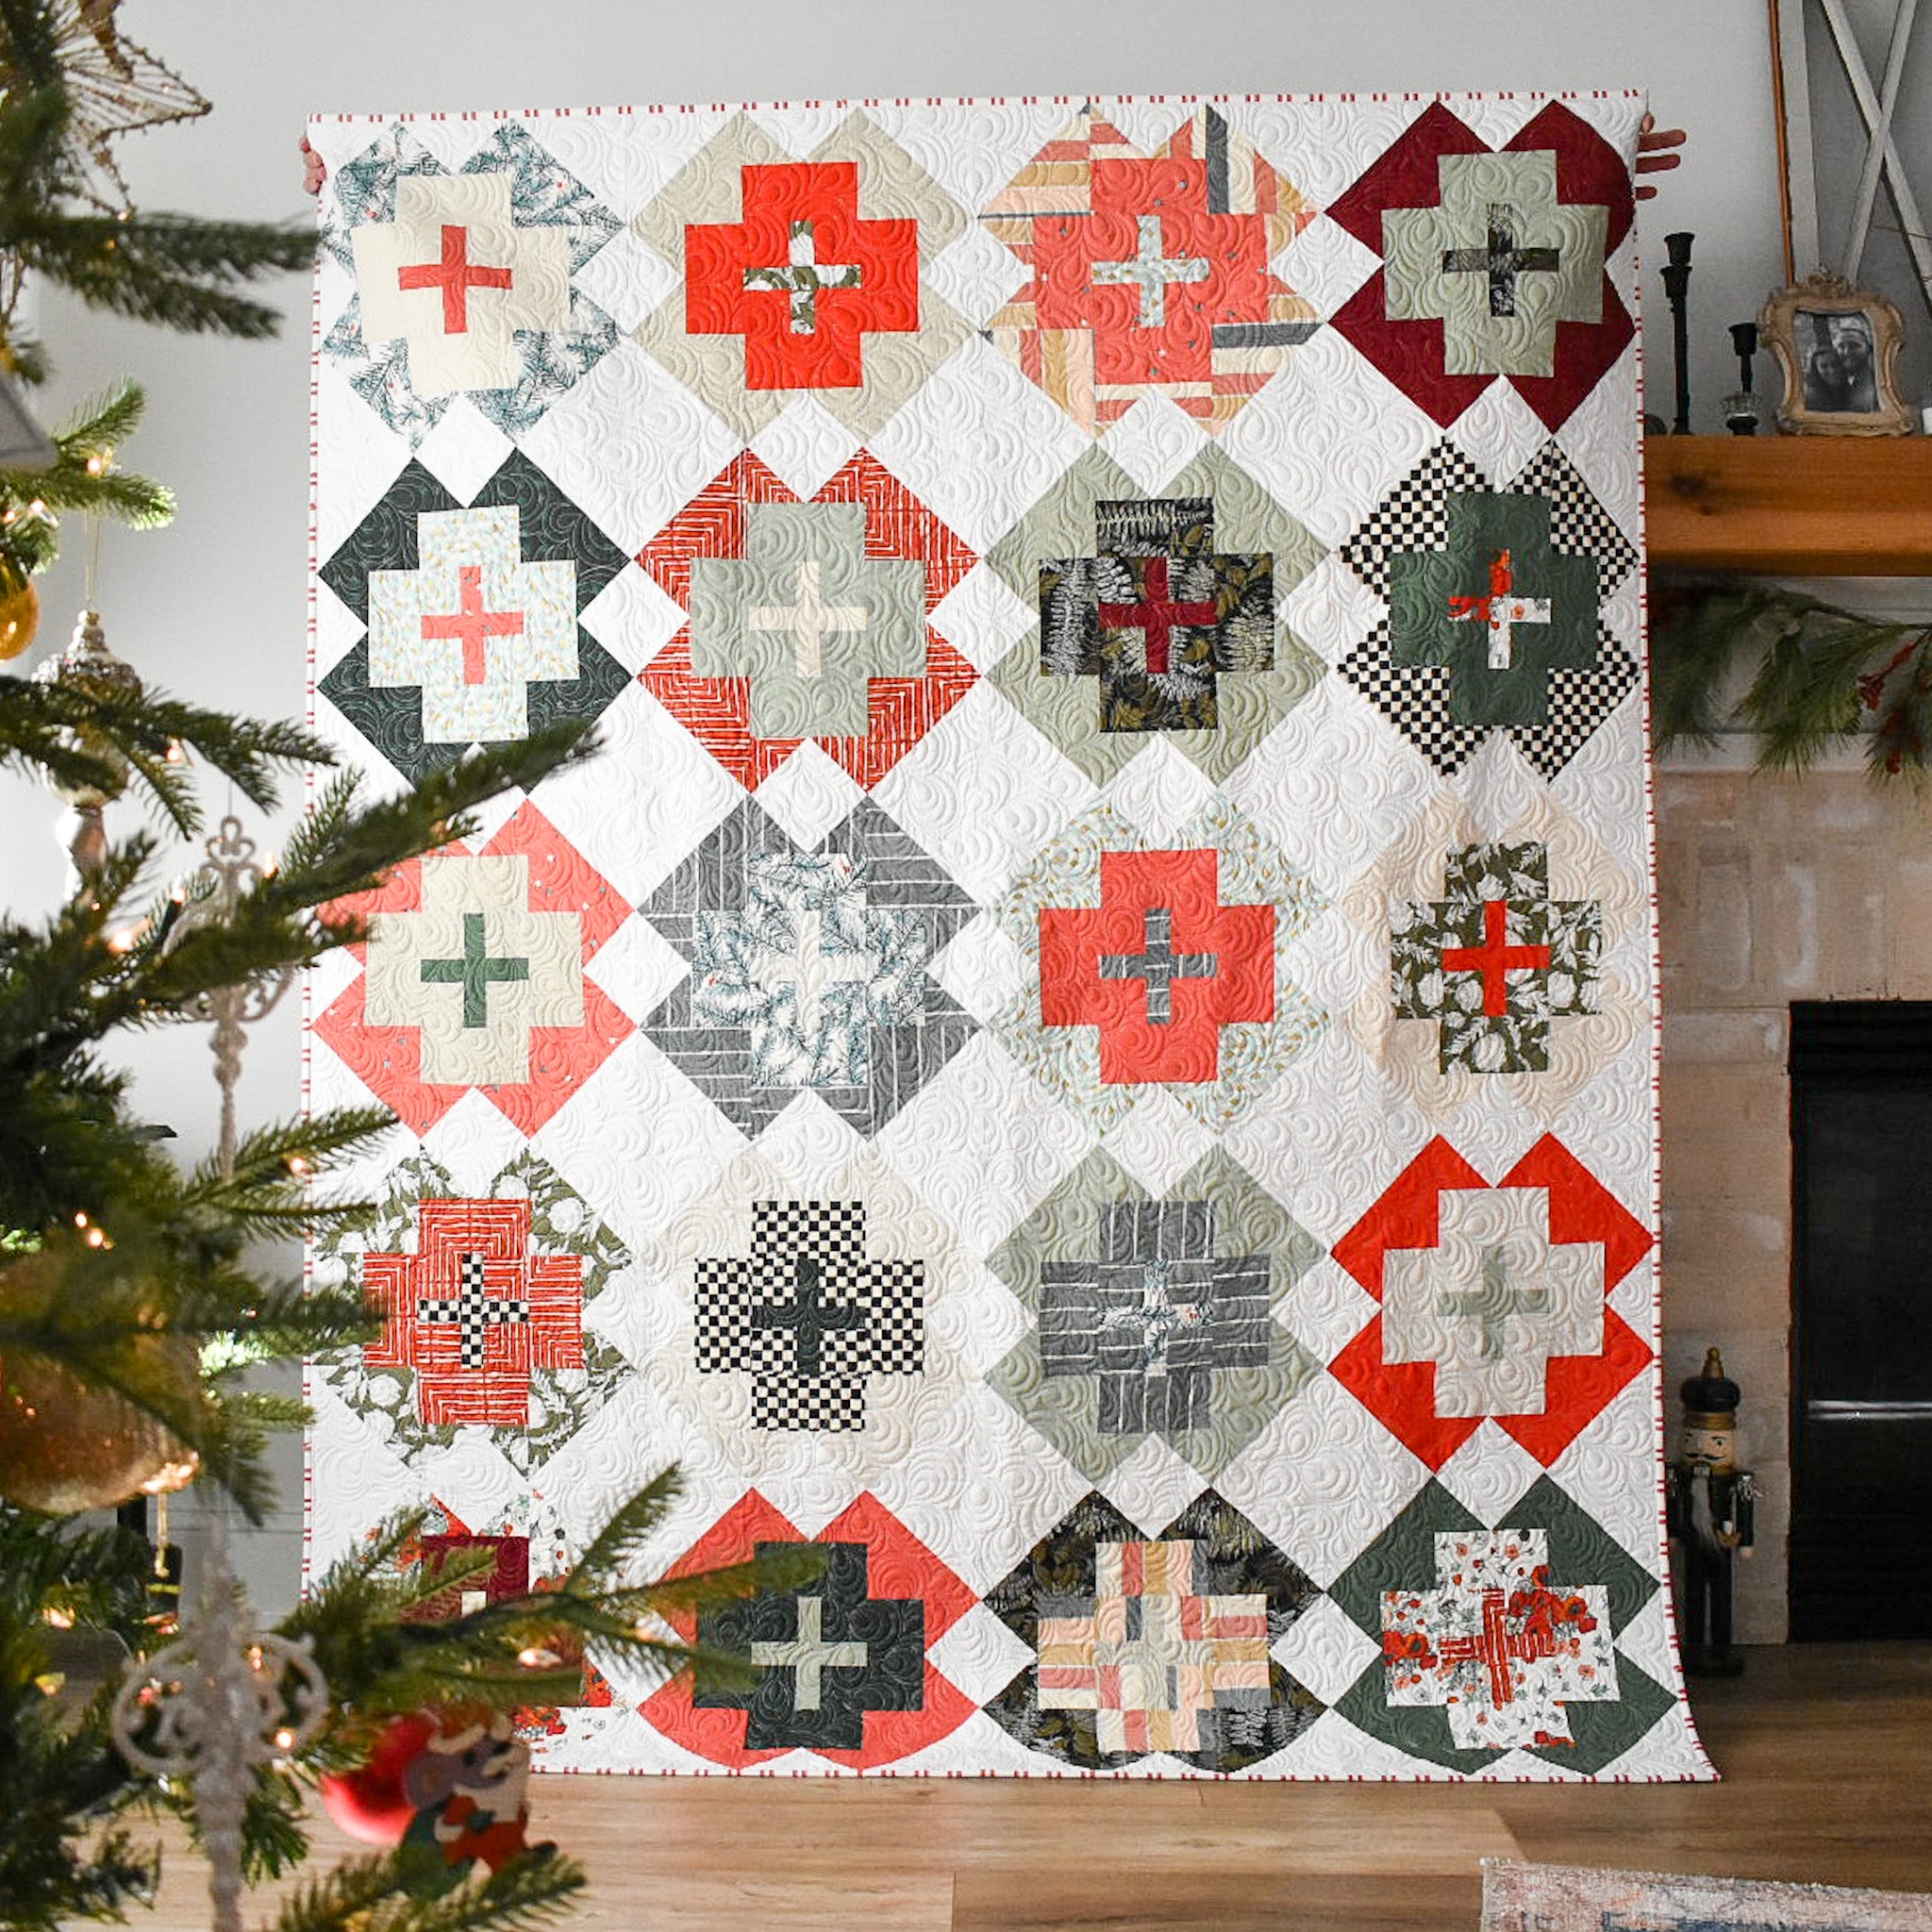
Christmas Joy was one of my first few quilt patterns back in the day! When I was designing this quilt back in 2017, I wanted a simple and classic red and white quilt that reflected the nostalgic traditions of Christmas. This quilt is definitely my most traditional pattern, but that doesn't mean that I love it any less! If you're unfamiliar with Christmas Joy, the pattern is written for two colors, so there's lots of strip piecing to make the construction quick and easy. There are multiple sizes, ranging from Wall Hanging, to Throw to all the bed sizes! I also added fat quarter instructions so that you could use one fat quarter per block if you wanted to! I have a blog post for how that looks here.
Here's a throw-back to the OG Christmas Joy.....
.

.
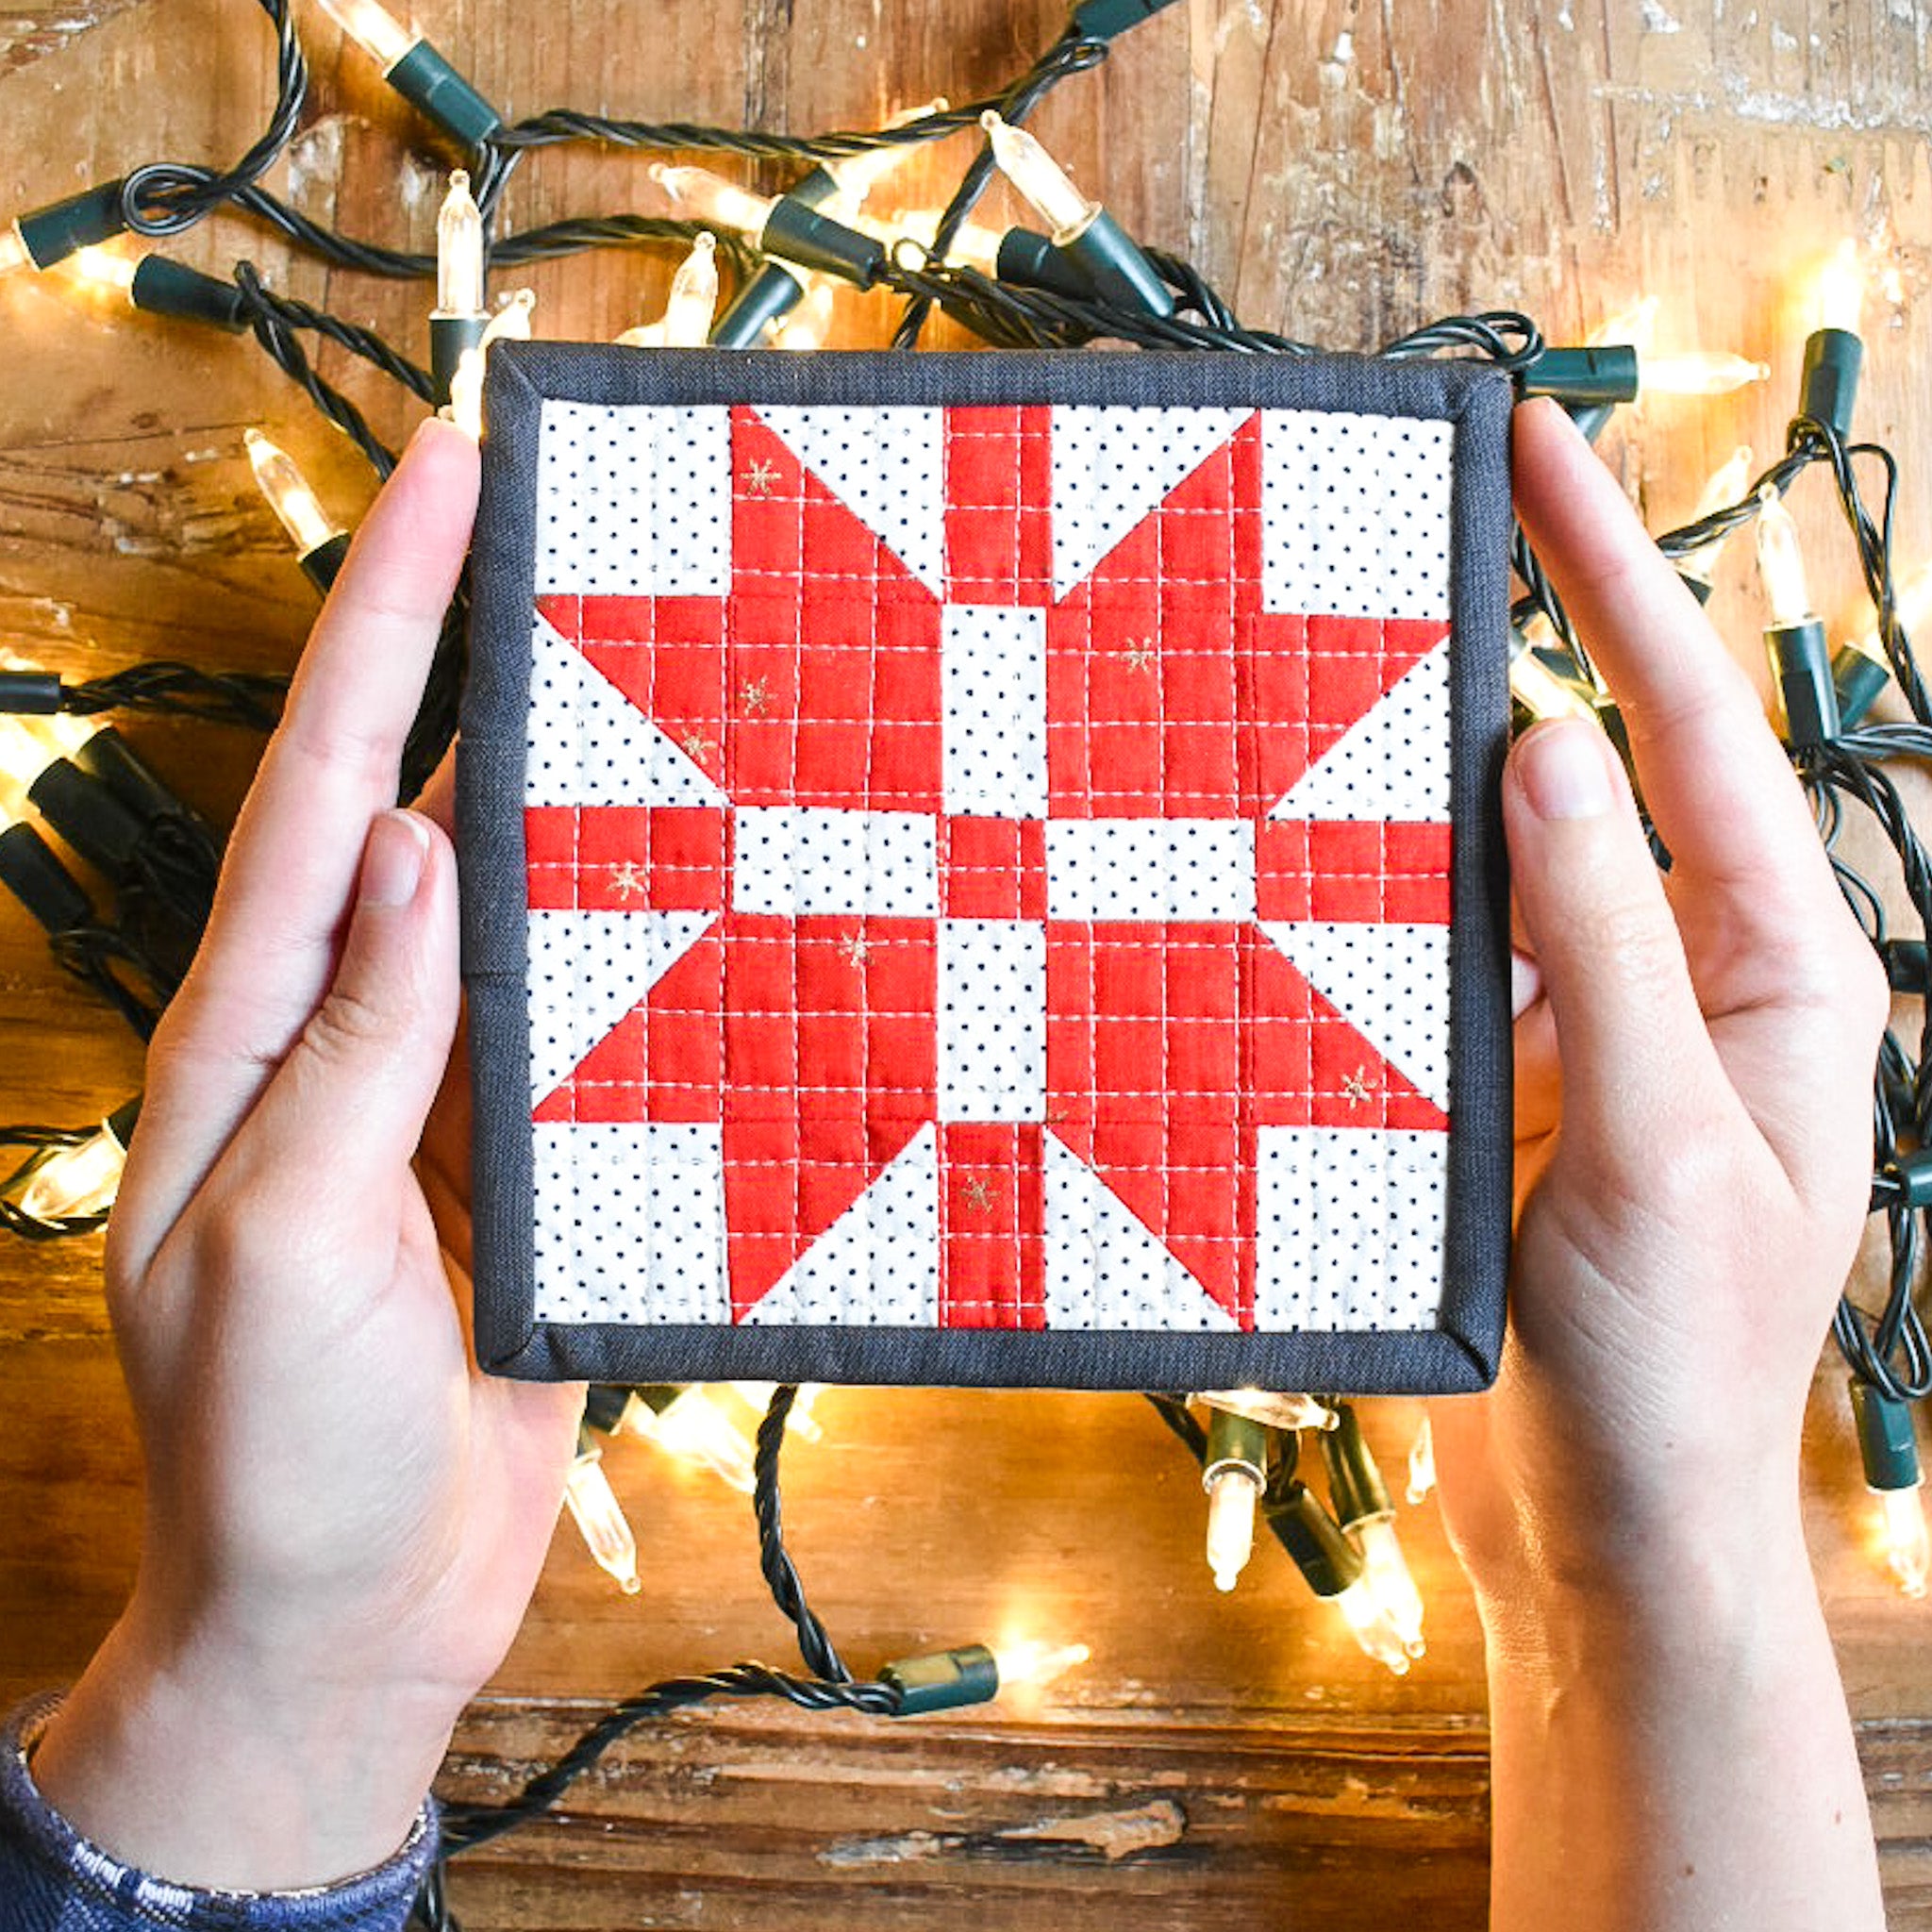
Anyways! Back to the reason for this post. I've been wanting to make a mini-quilt block ornament since last Christmas. Originally, I thought I'd create a small Retro Ornaments one....but I just couldn't get the curves figured out! (maybe next year!) I then resorted to something a bit more simple.....a teeny-tiny Christmas Joy Block!
.
.

.
It's so cute, right?! Keep scrolling to the end to see what I'm going to use mine for!
Here's what you'll need:
.

.
Tip: Consider starching your fabric before you cut.
Red Fabric:
- (1) 4" x 4"
- (4) 1.5" x 1.5"
- (4) 1" x 1.5"
- (1) 1" x 1"
White Fabric
- (1) 4" x 4"
- (4) 1.5" x 1.5"
- (4) 1" x 1.5"
.
If you are making a mini-quilt, you'll need a backing: I recommend 7" square at minimum. For batting, I recommend a 6" square piece and for the binding, I recommend a 2.25" x 30" piece of fabric. The unfinished block measures 5" square, so if you'd like more wiggle room in your batting/backing, plan accordingly :)
.
Half Square Triangle Construction
First, you'll want to create those tiny HSTs. Honestly, this was pretty fun! I still used the 8-at-a-time, just like the full size pattern does, and I also created them so that there was a little bit of wiggle room for trimming.
So, you'll place your red and white 4" squares right sides together and align their edges. Then on the back of one of the squares, draw two lines diagonally from corner to corner. Then pin the squares in place. Sew a 1/4" seam on both sides of the lines.
.

.

.

.
Then cut this unit in half horizontally, vertically and along your drawn lines.
.

.
Next, press your HST seams open. Since these units are so small, I used my wool pressing mat, which helped "grip" the fabric so that it didn't slide and warp as I was pressing the seam. It also helped to use my fingers to gently press open the seams before I used my iron. You'll want to press the seams open, instead of to one side so that everything will lay nice and flat within your block.
Once your HST seams are pressed, trim each HST so that it measures 1.5" square. If you need tips for how to trim HSTs, refer to this blog post.
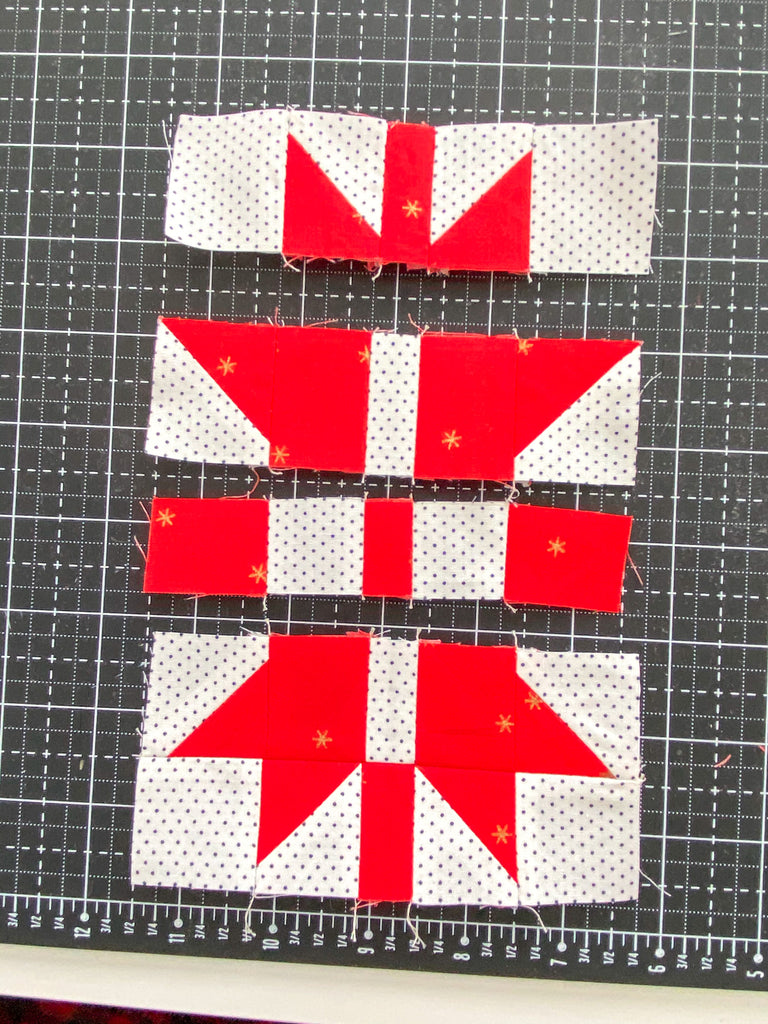
Then, lay out all of your pieces as seen below and assemble horizontal rows. I chain piece all of my rows so that I'm not starting and stopping so many tiny seams. I highly recommend doing this! You can find a tutorial for this method in this blog post.
.

.
Once your rows are assembled, cut the "chain" seams that are connecting them, then press all of the seams open. Again, finger pressing beforehand and a wool pressing mat works wonders!
.

.

.
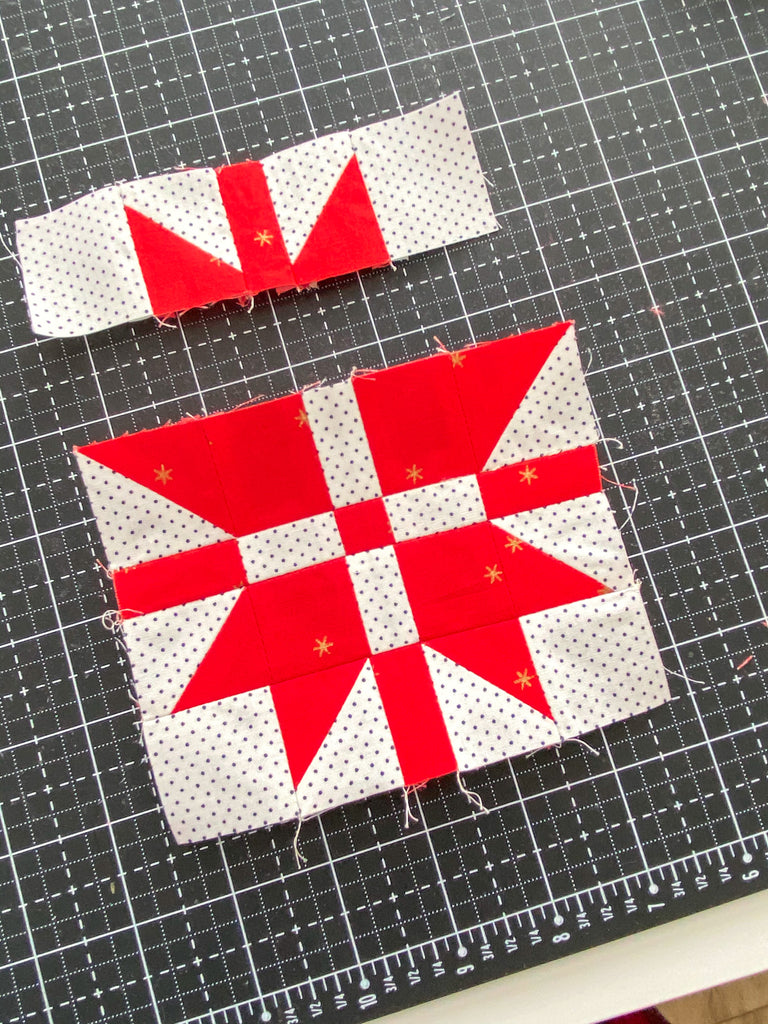
Now sew the 5 rows together. Use pins to line up the seams. Press the row seams open.
.

.

.
.

.
.

.
You did it!! The unfinished block should measure 5" square. Now you can repurpose the block however you'd like! You could turn it into a coaster, using my scrappy coaster tutorial; or just baste, quilt and bind it and use it as an ornament! I used my Janome Continental M7 for the piecing and quilting and it was such a dream! The HP needle plate and foot are WONDERFUL, especially for accurate piecing.
.
I used scrap batting and random fabric for my backing and created a quilt sandwich. I normally hate basting quilts, but doing a tiny one like this was sooooo much easier than a larger one!
.

.

.

.
I used my Janome Even Feed Foot (aka walking foot) with a stitch length of 2.5 mm. I used the edge of my foot as a guide....the lines are a little more than 1/4" apart. I decided to quilt my block with cross-hatch straight lines. I briefly considered adding diagonal lines in this but I think that might've been *too* dense. I'm happy that I left it as this.
.

.
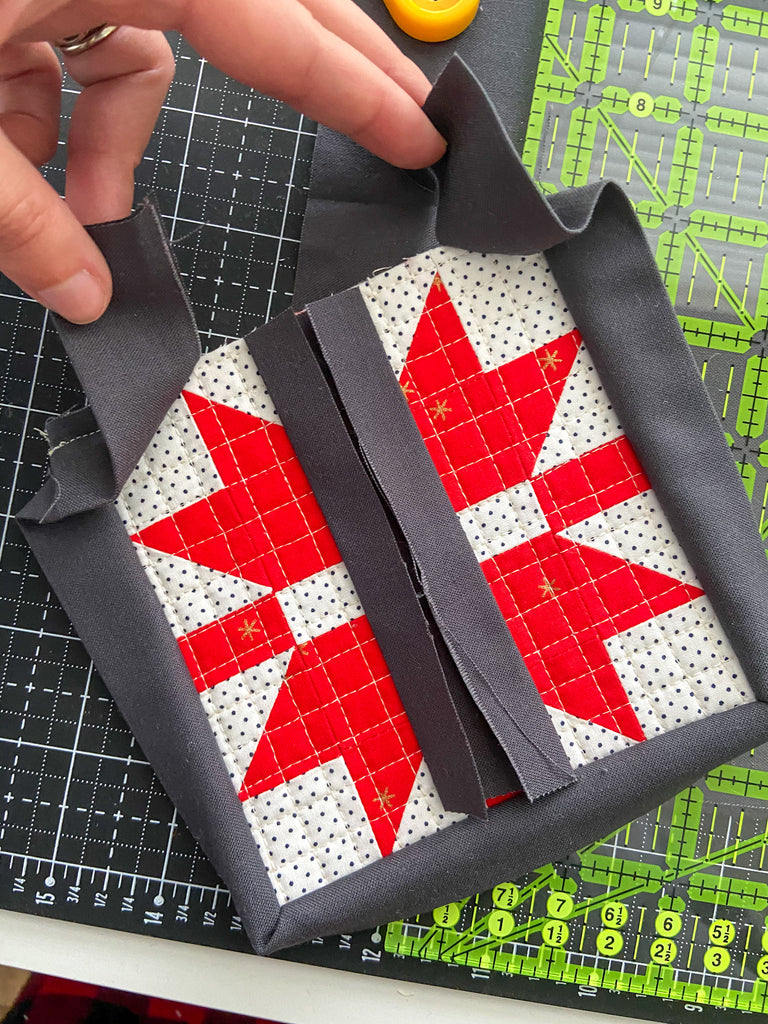
I added binding just like I would with any of my full-size quilts. I used a 2.25" strip. For this, I wanted to try something that I've never done before. Normally I sew my two binding edges together diagonally, but with everything being so tiny, I wanted to try using a flap of fabric to cover up the raw edges of my two binding strips. This was super easy to do, but it did create a little bit of bulk. I think with practice, I could make this look a lot prettier, but here's what I did:
.
Trim away the batting/backing to create a clean edge around the block.
.
.
Attach the binding strip to the front (or back) of the quilt block. You can find my binding tutorial here. Once you stitch almost all the way around your block, trim the binding so that the two raw edges touch. I could've stitched the entire way across, but I'm used the my old way of binding, so I stopped a few inches from the end.
.

.
From the binding piece that you trimmed off, re-iron a crease so that the two raw edges meet in the middle, as seen below. You don't need a long piece like I used, but I wasn't sure....so I used extra. ;) Line up the short edge of the binding flap with the raw edge of your quilt block. Then place the two binding strips on top. Fold the flap piece over the two binding strips, the trim so that it aligns with the raw edge of the block. Continue to sew the remaining section of binding to the quilt block.
.
.

.

.
Then flip the binding around to the back side of the block and either machine or hand stitch it down. If you are turning it into an ornament, you could secure a loop of string in your binding.
.

.

.

.
Here are some ideas for what to do with your mini block:
- Sew several together to make placemats or a table runner
- Sew a block into a Christmas Stocking
- Once it's quilted and bound, sew a string on the back of the block to create a Christmas ornament
- Sew several quilted blocks to a long string or ribbon to create a banner and hang it on your fireplace or in a doorway.
What are some other ways you can use this mini block? Let me know in the comments!
.
LINKS:
- Christmas Joy Quilt Pattern - Digital PDF Download
- Christmas Joy Quilt Pattern - Printed
- Blog Post - My Vintage Inspired Christmas Joy Quilt
- Tutorial - How to Trim HSTs
- Tutorial - How to make Scrappy Coasters
Happy sewing!
.
.
.
.
.
.
.
This post may contain some affiliate links meaning I may receive a small commission from each sell. Rest assured, I only share my favorite items with you!
